Step 1:
After starting FinalAlert, click on File->New. You can click on OK 2 times. In the last dialog, enter 50 x 50 as size. Then click OK. FinalAlert will now load graphics and prepare the map. After FinalAlert has finished, youīll see your (empty) map.
Step 2:
We want to have a cliff at the bottom left of the map. To do this, we can use the cliff painting tools (the first 2 green icons in the
 bar). We first make the back of the cliffs. Select the second tool, move your mouse where you want the cliff top (we call this point A), hold down the mouse button, and move it to the bottom right. Then again click on point A and move your mouse to the bottom left (this is point B). Now we hold down the mouse button once more and move the mouse to the right bottom. The result should be something similar to this:
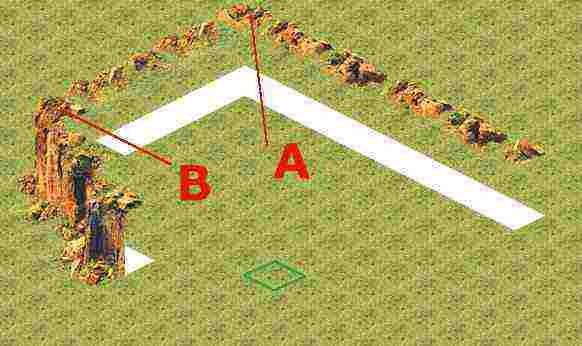
Step 3:
We still need the front of the cliff. To paint it, we just use the front cliff painting tool (this is the first tool). Very similar to Step 2. Drag the cliffs from A to B, from C to D, and from D to E. The result should be similar to this:

Step 4:
As you see, our cliff has some white squares in it. This is because the RA2 and TS maps are not just 2d, but 3d maps! First, you should use the AutoLevel tool (the third tool in the
 bar). Just click on it. You will now see something like this:
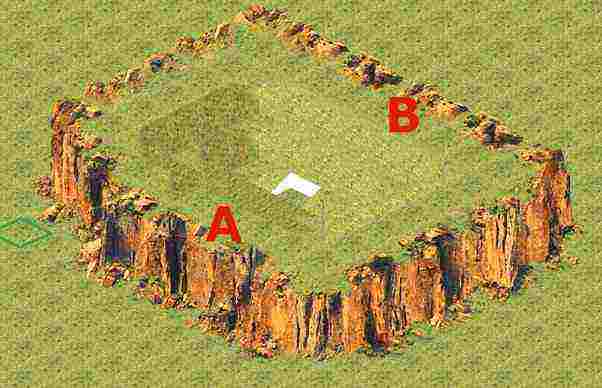
As you see, it looks much better now, but it is not yet correct. To make it completely flat, we use the flatten terrain tool (the third icon in the
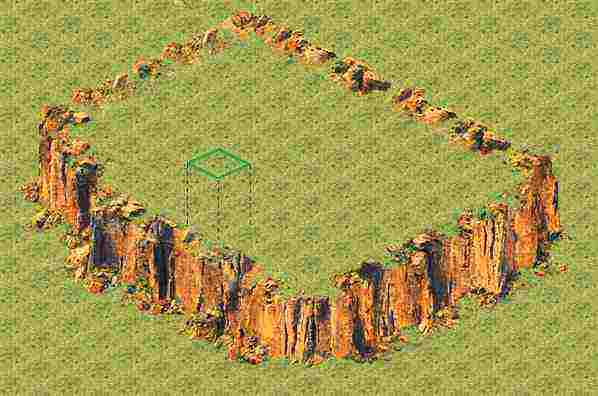
 bar). Select the tool, hold down the mouse button at A and move the mouse to B. You should now know what you need to do. Just flatten the whole cliff, until it looks like this (be aware that you can use the brush size in the toolbar to do this faster):
Step 5:
Now we want the player to be able to send troops onto the cliff. We need to use the terrain browser at the bottom to do this. Select the tileset "0025 Slope Set Pieces", and select the first tile in this set. Move your mouse to the cliff, and when you are at the correct position, click. It should look like this:
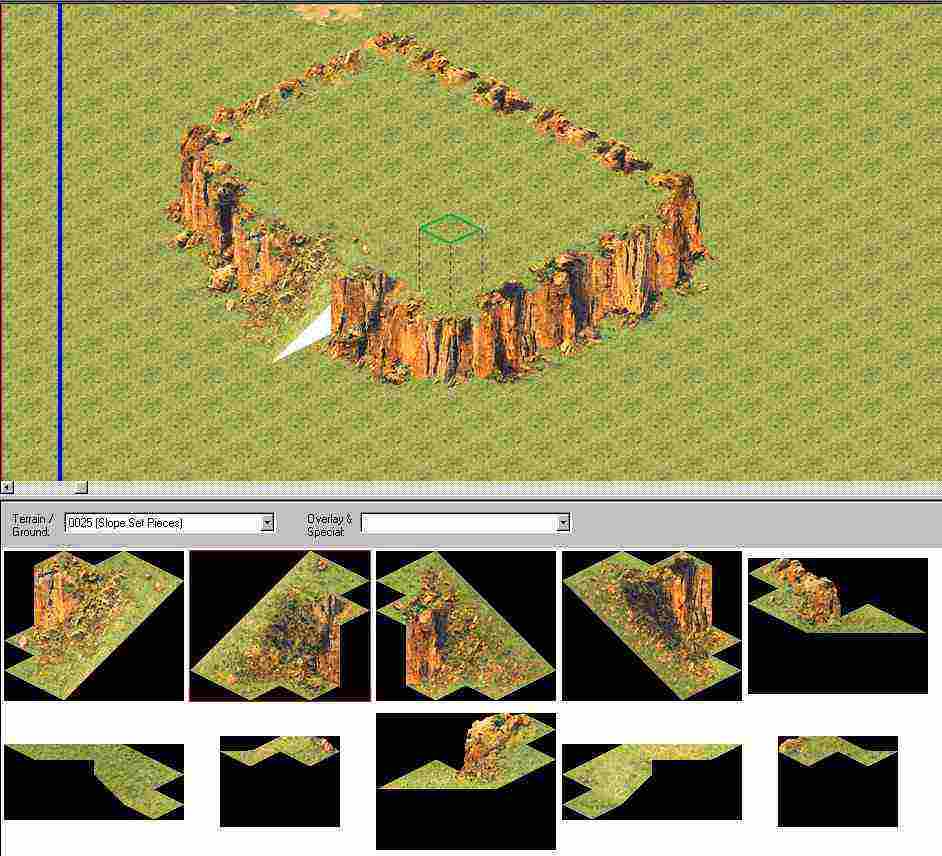
As this is only one part of the slope, we need to select the second tile in the tileset, and do the same procedure. Result:
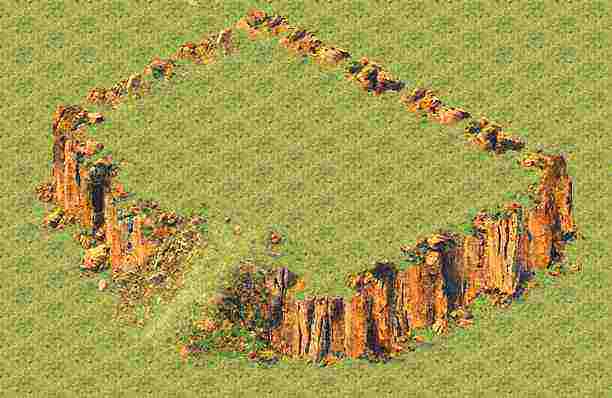
We now have a fully working cliff, and the player can send units onto this cliff.
Step 6:
Now we want to have another cliff that is connected to our first cliff by a bridge. First paint the second cliff like the first cliff (Steps 1-4). Place it to the right of the first cliff (not too far away). Then use the terrain browser similar to Step 5 to paint the bridge heads (tileset "0019 Bridges"). This should be the result:
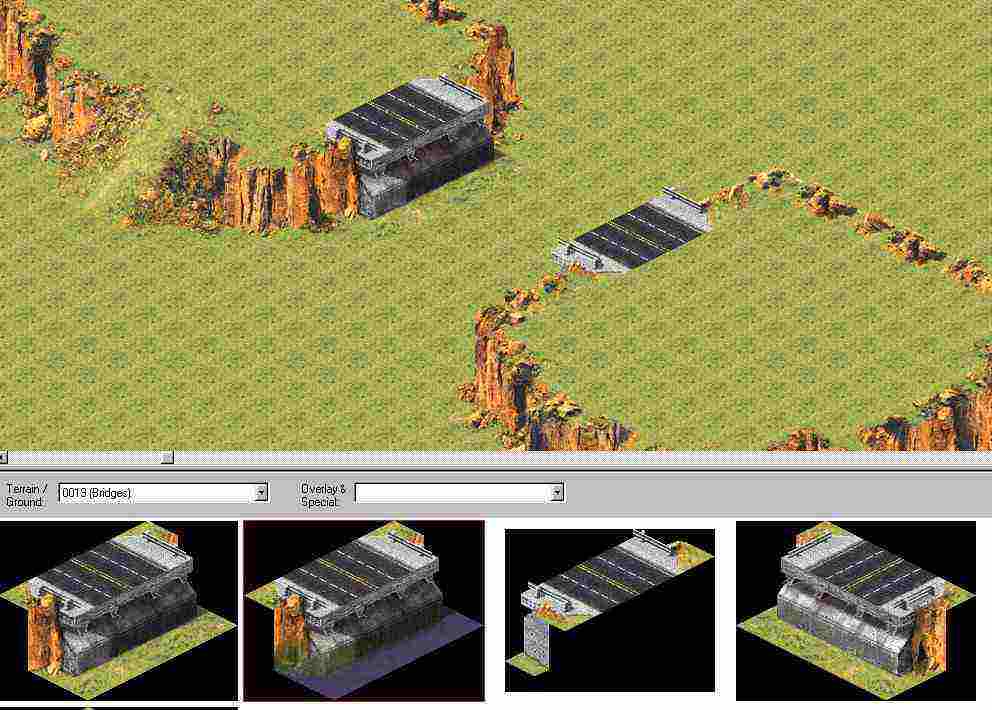
Step 7:
As you see, we donīt have the bridge itself yet. To paint it, use the object browser at the left. Click on the + next to Special/Overlay and then on the + next to bridges. Select the Big Bridge. Then move the mouse onto the mid of the first bridge head, and, while holding down the left mouse button, move it to the mid of the second bridge head. While dragging, this should be visible:
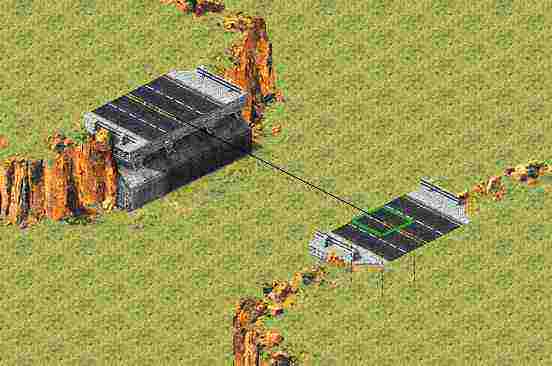
After you release the left mouse button, the bridge will appear:
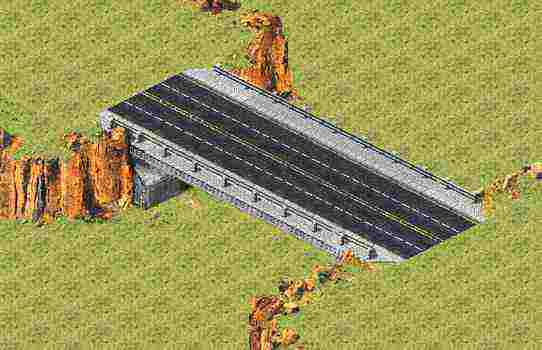
If you want to, you can use the terrain browser to place some streets to make it look better, but thatīs not really necessary for the map to work.
Step 8:
The complicated parts are finished now. We want to place some water now to divide the map into 2 areas. Use the object browser at the left and click on the + next to Ground. Then select water. I recommend using brush size 3 x 3 or bigger. Move the mouse where you want to place the water. Youīll see that FinalAlert automatically creates the shore. Click with the left mouse button to place the water. Itīll look like this:
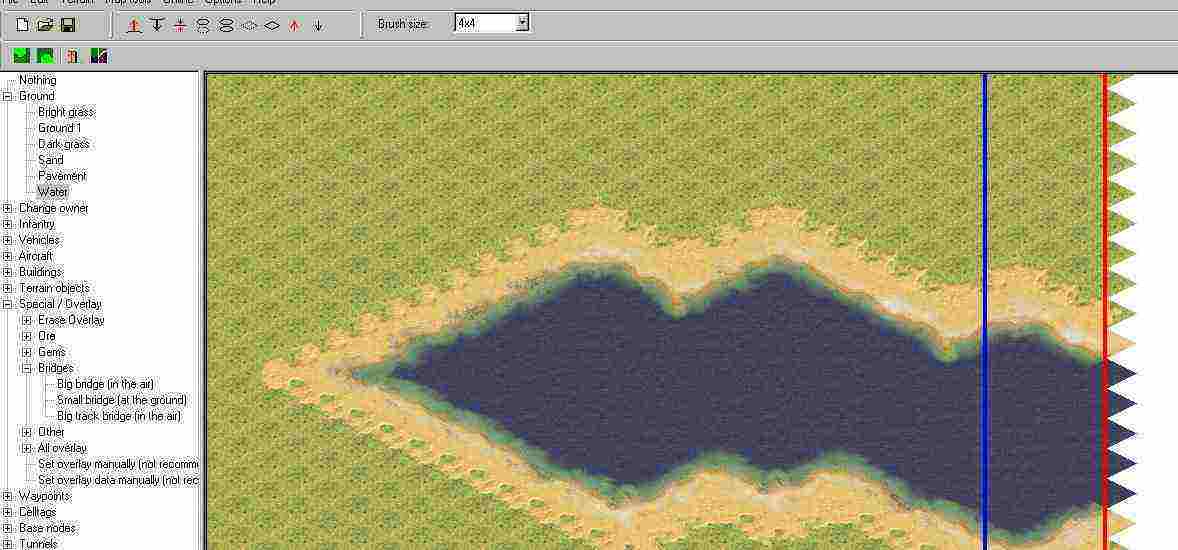
Continue placing water until the map is divided, but leave a passage so that the players can attack each other.
Step 9:
We now have the general appearance of our map ready. But we still have to set up the player locations. To do this, select Player locations in the object browser. We currently have 8 players on the map, but we want it to be a 2 player map. There are other ways to do it, but the best one (because of some issues with RA2 like automatic map transfer) is to place any player locations that are not needed next to the real starting location. To place a starting location, select the player and then click on the map. For our map, the area of the first starting location should look similar to this:
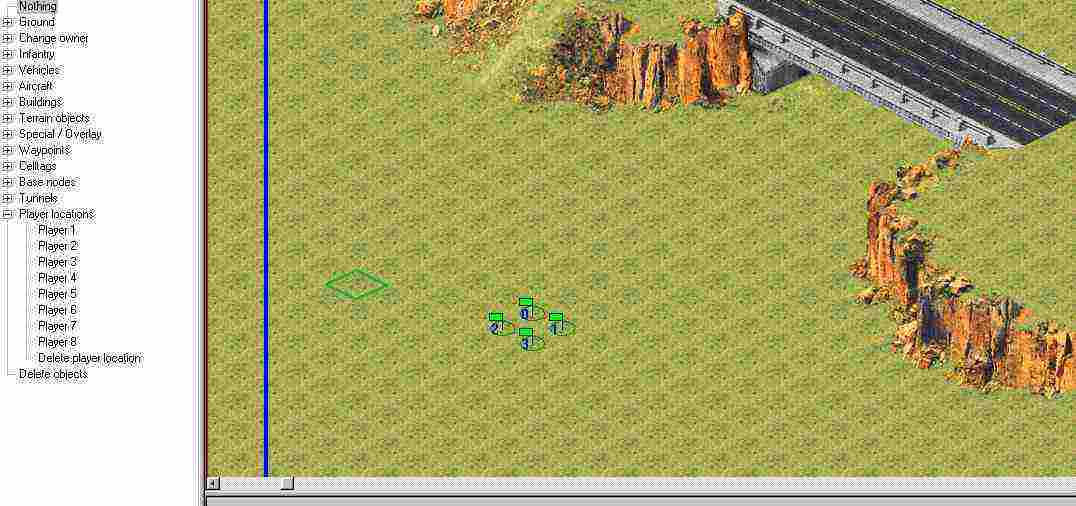
Place the other starting locations at the other starting area.
Step 10:
We need ore! Without ore, the game would be a bit boring. To place ore, use Special/Overlay->Ore->Random ore at the object browser at the left. This tool uses the brush size, too. The result:
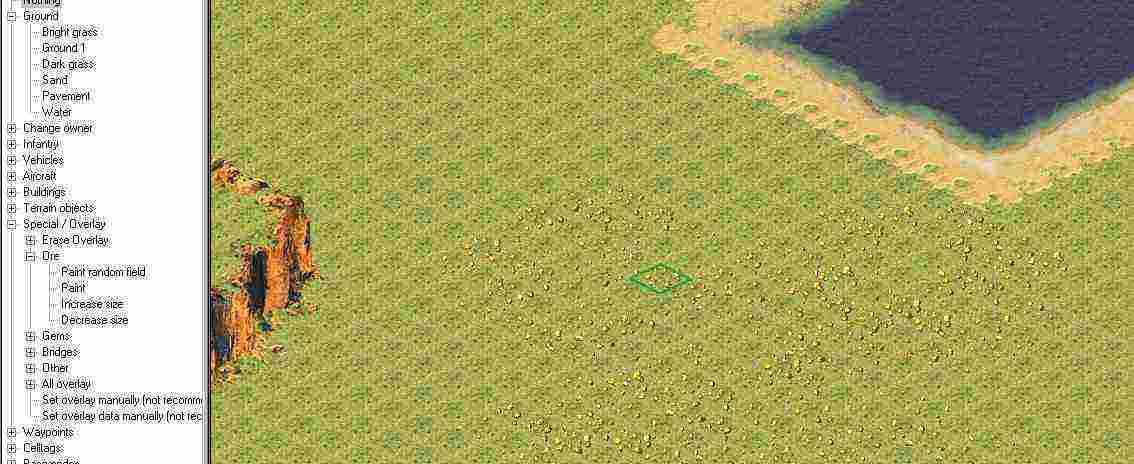
If you want to place some ore mines, use Terrain Objects->Ore mines in the object browser.
Thatīs it! You have made your first map featuring many things professional maps have. You can of course place some buildings, trees (under terrain objects), gems etc. now, but thatīs not part of this tutorial, as it is very easy. To play the map, use File->Save. The check map dialog will appear (it should not display any errors). Click on OK. Specify the filename (it must be a .mpr file) and click on OK. In the next dialog, you can enter the map name as it will appear in Ra2/TS. You can also specify if the map shall be compressed (you should try with, but it sometimes does not work fine in RA2/TS and diagonal lines appear) and if a preview shall be saved.
Now start RA2 and start a new skirmish game. Select your map in the list. Youīll see that there are 8 player slots. Choose one enemy (as we have a 2 player only map). Now start the game.